
READY TO START?
YOU WILL NEED TO HAVE
ADVANCED KNOWLEDGE OF PSP AND ANIMATION SHOP (AS).
THANK YOU TO THE TALENTED CREATORS OF MY SUPPLIES
SUPPLIES NEEDED:
You will need a tube of choice. I'm using the wonderful artwork of Myka Jelina.
You must purchase a license to use her work, you can purchase it at www.CILM.com
FILTERS NEEDED: EYE CANDY 5 IMPACT:BEVEL, DSB FLUX:BRIGHT NOISE & XENOFEN:CONSTELLATION
A ROUND MASK OF CHOICE
WRITTEN IN PSP X
ANIMATION SHOP 3
Start with a 600x600 canvas, flood filled white. Add a new raster layer and flood fill that with the gradient: metallic silver (angle: 0 and reapeat: 1)
Apply your mask and merge group.
Grab your preset shape tool and set to eclipse. Stroke black line width 2 and fill gradient metal steel. Draw out a large circle. OBJECTS:ALIGN:CENTER IN CANVAS.
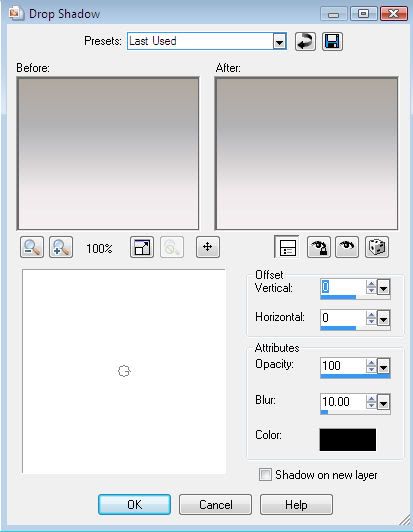
Apply the following dropshadow:
Duplicate the circle layer. Hide all but the 2 circle layers and merge visable the two circle layers.
Apply the first filter, EYE CANDY IMPACT: BEVEL (at default settings) and add the same drop shadow, unhide all.
Add your tube and apply the same drop shadow.
Select a nice font, stroke black stroke width .5, fill metallic steel and type out the name and add the same drop shadow.
Add your copyright information
We'll add the next 2 filters at the same time, one frame at a time.
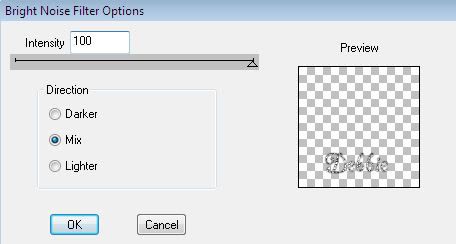
First, frame 1: select your name layer and apply this filter:
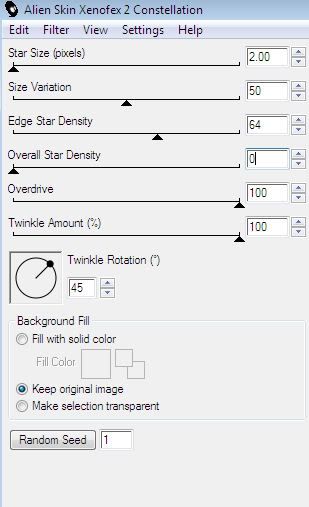
Then, select your circle layer and apply this filter:
Save as frame 1 for your animation.
Repeat this step for frames 2 & 3, selecting mix (2 times for frame 2 and 3 times for frame 3 on DSB FLUX) and "random seed" for both filters each time.
LET'S ANIMATE IT!
Open your animation shop. Using your animation wizard, open all three frames, set your set your frame properties to 15. Resize it to your liking and save it as a new GIF file.
I hope you enjoyed this tut!

written by Merrilee Finney
©DezinesbyMerr
DO NOT COPY, please link to this site to share.
This tutorial is for personal use only, you may not profit from it.


0 comments:
Post a Comment